
Transform annoyance into action through the art of troubleshooting. Homeowners are often faced with the little hiccups of daily life, one being the occasional need for resetting Chamberlain opener mechanisms in their garage doors. Whether it’s due to a power surge, a mischievous glitch, or simply the time to update security settings, knowing how to perform a garage door opener reset is a valuable skill. Fear not, this guide is designed to provide you with the knowledge and confidence to tackle the task of Chamberlain garage door troubleshooting head-on, ensuring your garage door operates smoothly and securely once again.
Key Takeaways
- Understanding your Chamberlain opener’s reset process can save you both time and money.
- Common scenarios such as power outages or reprogramming necessitate a garage door reset.
- A step-by-step guide ensures a hassle-free resetting experience.
- Perform regular maintenance to minimize the need for frequent resets.
- Safety is paramount—always turn off the power before attempting any resets.
- Reprogramming your remote control is a breeze post-reset.
- Professional help is available for complex troubleshooting issues.
Introduction to Chamberlain Garage Door Openers
As homeowners celebrate the advances in home automation and security, the Chamberlain brand stands out in the United States for its dependable garage door openers. With the integration of innovative features and user-friendly designs, Chamberlain opener installation becomes not just a convenience but a staple in the modern home. However, even the most reliable systems occasionally need a refresh or configuration update for peak performance. This section dives into the essence of setting up these complex devices and why resetting is sometimes essential for maintaining your garage door’s functionality and safety.
The Importance of Proper Setup
Achieving the perfect balance between safety and efficiency starts with a precise garage door opener configuration. A correct setup ensures that your Chamberlain opener operates smoothly, minimizes the risk of malfunctions, and extends the lifespan of your garage door mechanism. Correct installation is the cornerstone upon which dependable garage performance is built, and Chamberlain’s suite of products is designed with this in mind.
Why You Might Need a Reset
Resetting your Chamberlain garage door opener can serve a multitude of purposes. Whether you’re moving into a new home and want to ensure your household’s security, or you’re upgrading your existing garage door system—resetting the opener clears previous configurations and makes way for the new. Moreover, after power outages or hardware updates, a reset can be vital to restore proper functionality. The benefits of this simple process include enhanced security through the elimination of old access codes and the seamless integration of new features or remote devices.
| Feature | Benefit | Setup Requirement |
|---|---|---|
| MyQ Technology | Remote Access and Monitoring | Wi-Fi Configuration |
| Battery Backup | Uninterrupted Use During Power Outages | Regular Testing |
| Security+ 2.0 | Enhanced Security With Encrypted Codes | Periodic Code Reset |
| Triband Technology | Improved Remote Range | Proper Antenna Placement |
When to Consider Resetting Your Garage Door Opener
Regular upkeep and understanding when to reset your garage door opener are integral to the smooth operation of your home’s entryway. At times, you may encounter garage door opener problems that seem complex but can be resolved with a simple reset. Delving into the scenarios that necessitate such a step will help you maintain your Chamberlain garage door opener with confidence.

Common Issues That Require a Reset
Recognizing garage door opener problems is the first step towards resolution. Several indicators suggest the need for a Chamberlain opener reset, prominent among them being a non-responsive garage door after engaging your remote control or wall switch. Here are other conditions that might signal the need for resetting your garage door opener:
- Remote control failure even after battery replacement
- Erratic door movements or garage door reversing without obstructions in its path
- Door fails to open or close completely, suggesting limit setting errors
- Experiencing security concerns, such as an outdated access code
Maintenance and Troubleshooting Precautions
Before considering a full reset, garage door maintenance serves as the foundation for troubleshooting many issues connected to Chamberlain openers. By regularly examining your system, you can often prevent or quickly fix minor problems without needing a reset. Here are precautionary measures and troubleshooting tips to employ:
- Inspect the garage door opener for any obvious signs of damage or wear.
- Perform routine checks, such as testing the balance of the door and ensuring the sensors are unobstructed and aligned.
- Lubricate the moving parts annually to promote smooth operation and reduce strain on the motor.
- In case of opener malfunction, try unplugging the unit for a minute to reset its internal circuitry before opting for a full system reset.
If the above troubleshooting steps don’t resolve the issue, a full reset may be needed to clear all previous settings and start afresh. Always remember that continuous opener malfunctions or complex garage door maintenance issues warrant consulting with a professional for troubleshooting Chamberlain openers to ensure safety and proper handling.
Preparation Steps Before Resetting
When it comes to performing a garage door reset preparation, it is crucial to approach the task with a methodical plan to ensure safety and efficiency. Proper preparation minimizes the risk of errors and the potential for accidents, providing peace of mind throughout the reset process. Before diving into the core steps, we’ll outline the essential tools you will need and highlight crucial safety tips to keep in mind.
Gathering the Necessary Tools
To smoothly execute a reset on your Chamberlain garage door opener, having the right tools at hand is imperative. A few basic yet indispensable items you’ll require include:
- A sturdy ladder to safely reach the garage door opener unit
- The Chamberlain remote for reprogramming post-reset
- An appropriate screwdriver to access the opener’s panel, if necessary
Assembling these items beforehand will streamline the process and prevent any unnecessary interruptions once you’ve commenced with the resetting procedure.
Safety Measures to Keep in Mind
Ensuring the safest possible environment is paramount when dealing with any home repairs, especially when it comes to your garage door opener. To guard against electrical hazards, always turn off the power to the opener before attempting any work. Additionally, make certain that the garage door is securely closed to avoid any sudden movements during the reset.
Thoroughly reading the user manual specific to your Chamberlain model is highly recommended as it contains invaluable information tailored to your system. In situations where safety is a concern, or if steps seem complex, having an assistant present provides an extra layer of security, allowing one person to hold the ladder, pass tools, or operate switches as needed.
By following these safety tips for garage door reset and coming prepared with the right equipment, you can ensure that you’re well-equipped to handle the reset process with confidence and caution.
Here’s a quick-reference safety checklist to consider:
| Preparation Task | Description | Reason for Safety |
|---|---|---|
| Power Disconnection | Turn off the power supply to the garage door opener. | To prevent electric shock and accidental activation of the door. |
| Ladder Stability | Ensure the ladder is stable and secure. | Prevent falls or injury. |
| Garage Door Position | Verify the garage door is closed. | Eliminate the risk of the door moving unexpectedly. |
| Manual Reference | Review the owner’s manual for specific instructions. | Customize the approach to the specific make/model of your opener. |
| Assistant Availability | Have someone assist throughout the resetting process. | Enhances safety by providing immediate help if needed. |
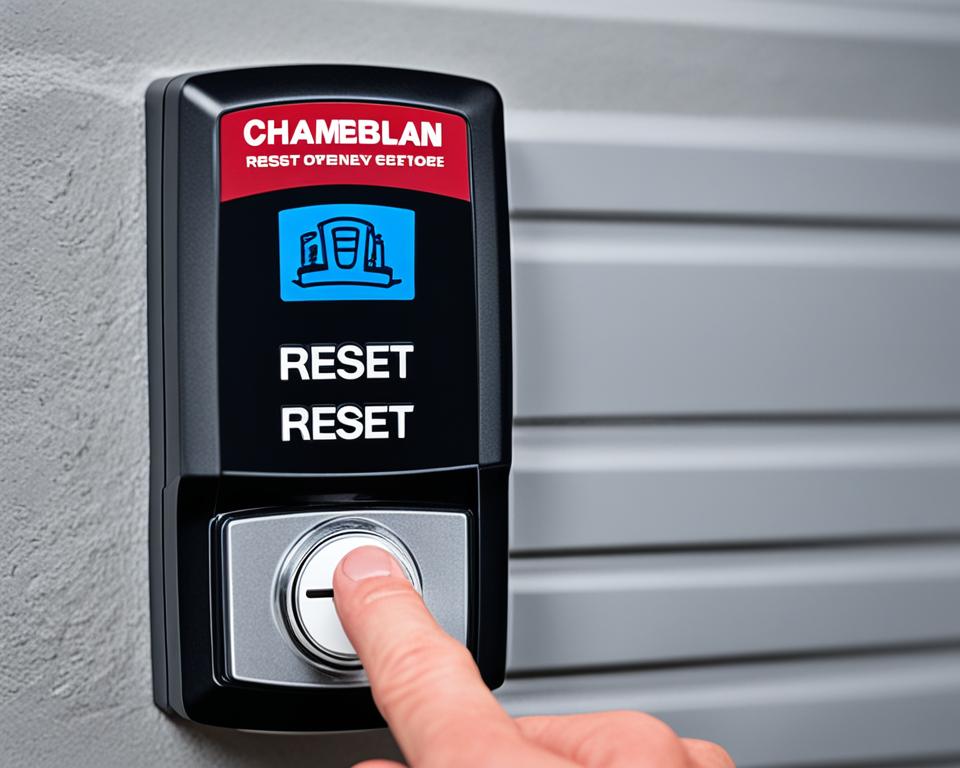
Detailed Guide to Reset Chamberlain Garage Door Opener
Is your Chamberlain garage door opener acting up? Don’t worry, a simple reset is often all it takes to solve common issues. This step-by-step Chamberlain reset guide will walk you through how to reset your Chamberlain door and get it working smoothly again. We’ll cover everything from locating the ‘Learn’ button to erasing old settings and programming new codes.
Let’s begin the process of resetting your Chamberlain garage door opener:
- Locate the ‘Learn’ Button: Climb a steady ladder to get a view of your opener’s back panel. You’re looking for a button labeled ‘Learn’ on your Chamberlain opener. The location may vary slightly depending on the model.
- Erase Old Settings: Press and hold the ‘Learn’ button for about 6 seconds until the LED light next to it goes out. This action clears all previous settings, including remote control connections.
- Wait for the Reset: After you release the button, there may be a brief pause as the opener’s system resets. Once the LED light turns on again, the unit is ready for reprogramming.
- Reprogram Remote Controls: To sync your remote again, press the ‘Learn’ button briefly and then, within 30 seconds, press the desired button on your remote. A click or the flashing of the LED light will confirm successful pairing.
- Test the New Settings: Attempt to operate your garage door using the newly programmed remote to verify that the reset was successful.
Chamberlain models may vary in reset procedures. It’s crucial to refer to your specific model’s manual for tailored instructions. The ‘Learn’ button might also be referred to as the ‘Smart’ button in some models.
If you encounter any issues during this process or need additional support, Chamberlain’s customer service is available to assist. For those who prefer visual aids, Chamberlain provides online resources including tutorials and FAQs that can be exceptionally helpful.
Note: If resetting your garage door opener doesn’t fix the problem, it may be time to seek professional assistance, as there could be a more complex issue at play.
| Step | Action | Expected Outcome |
|---|---|---|
| 1. Locate ‘Learn’ Button | Find and press ‘Learn’ button on the opener. | Ready to erase settings. |
| 2. Erase Settings | Press and hold button until LED goes out. | Old settings are cleared. |
| 3. Wait for Reset | Allow opener system to reset internally. | LED light turns back on, indicating readiness. |
| 4. Reprogram Remote | Pair remote control with opener. | Successful connection between remote and opener. |
| 5. Test New Settings | Use remote to operate door. | Garage door responds correctly to remote commands. |

Remember, maintaining your Chamberlain garage door opener through regular checks and understanding how to reset Chamberlain door mechanisms can save you from future headaches. With this guide, you’re well on your way to getting back full control of your garage door opener.
Programming Your Garage Door Opener Post-Reset
After resetting your Chamberlain garage door opener, the next step is to re-establish the connection between the opener and your garage door remote controls. This is an essential stage in the Chamberlain opener programming procedure. Follow these simple steps to ensure your garage door remote setup and opener function together seamlessly for optimal performance and convenience.
Setting Up the Remote Control
Once the reset is complete, programming the Chamberlain remote involves a straightforward syncing process:
- Press the ‘Learn’ button located on the garage door opener unit. You will have approximately 30 seconds to perform the next step.
- Within this 30-second window, press and hold the button on the remote that you intend to use to operate the garage door.
- If the pairing is successful, you’ll see a light on the opener blink, or hear a clicking sound, indicating that the remote is now programmed.
If you have multiple remotes for your garage, repeat these steps for each device to ensure all your remotes are programmed and ready to use.
Adjusting the Limit and Force Settings
To adjust Chamberlain garage settings, such as the limits and force, refer to the following guidelines:
- Limit Settings: These settings control where your garage door stops when going up or coming down. To adjust, locate the respective limit adjustment screws on the opener unit. Turn them clockwise or counterclockwise to set the desired stopping points.
- Force Settings: Controlling the amount of force with which the door opens or closes is critical for both safety and efficiency. Adjust the force settings using the control panel on the garage door opener. Increase or decrease the settings incrementally and test the door after each adjustment.

These steps ensure that your Chamberlain garage door opener operates according to your preferences and safety standards. Regularly review and fine-tune these settings as part of your maintenance routine for the best results.
| Adjustment | Description | Method |
|---|---|---|
| Remote Sync | Program new or additional remotes to the opener. | Press ‘Learn’ button then remote button within 30 seconds. |
| Limit Settings | Set the correct stopping points for the garage door. | Turn limit adjustment screws to calibrate door’s movement. |
| Force Settings | Regulate opening and closing force for optimal performance. | Adjust control panel settings and perform test runs. |
By following these instructions carefully, you’ll master the garage door remote setup and create a safe environment for your Chamberlain garage. For further customization or troubleshooting, always refer to the user manual specific to your Chamberlain model, or reach out to customer support for tailored advice.
Tips for Maintaining Your Garage Door Opener
Investing a little care in your Chamberlain garage door opener is essential for safeguarding its longevity and ensuring reliable performance. By adhering to a set of garage door maintenance tips, you can protect the well-being of your garage door mechanism. Proper maintenance not only ensures smooth operation but also contributes greatly to your home’s overall security. Let’s delve into a routine that will help keep your Chamberlain opener in top-notch condition.
Regular Maintenance Schedule
To maintain the efficiency of your Chamberlain garage door opener, developing a consistent maintenance routine is crucial. Periodic inspections can reveal wear and tear before it becomes problematic. Essential steps in a Chamberlain opener care plan should include inspecting the hardware for tightness, checking the alignment of electronic eyes, and ensuring all moving parts are adequately lubricated. It’s also recommended to test the auto-reverse safety feature and perform balance tests to confirm that your door is properly counterbalanced. Following these garage door maintenance tips can help fortify your opener against the rigors of daily use.
Signs Your Opener May Need Attention
Staying alert to garage door health signals can fend off costly repairs down the line. Be vigilant for unusual noises, erratic movements, or a door that doesn’t close evenly—the opener may be straining due to misalignment or an obstruction. Additionally, if your remote control becomes unresponsive or the door starts reversing for no apparent reason, it’s time to troubleshoot your Chamberlain opener. Recognizing these signs early often translates to simpler, more manageable repairs.
Maintenance is key to the optimal functioning of your Chamberlain garage door opener, but when complex issues arise or for annual tune-ups, it’s wise to call in professional maintenance services. Experts in garage systems will have the specialized tools and experience to diagnose and address issues beyond the scope of regular homeowner care. By incorporating these strategies into your home care routine, you can ensure your Chamberlain opener operates smoothly and reliably over the years.