
When your garage door won’t open, it can mess up your whole day. If you have a Linear brand opener, it’s probably a reliable product facing common issues. These problems can happen over time.
Linear makes dependable garage door openers like the LDCO series and LDO models. These openers offer convenience and security but can still have occasional problems. Troubleshooting is needed to fix these issues.
This guide will help you fix remote control failures, error codes, and mechanical issues. We’ll show you step-by-step solutions to get your door working again. You’ll learn from basic checks to more complex garage door opener problems that might need special tools.
Most homeowners can fix many common problems without a professional. With the right Linear garage door troubleshooting steps, you can save time and money. Plus, you’ll extend your system’s life.
Remember, safety is key before starting repairs. Always turn off power to electrical parts and be careful with moving parts. Let’s look at how to identify and fix Linear Garage Door Opener errors safely and efficiently.
Understanding Your Linear Garage Door Opener System
Before you start fixing your garage door opener, get to know your Linear system. Knowing how it works helps you solve problems faster. It can also save you money and time.
Common Linear Garage Door Opener Models
Linear has many models, each with special features. The LDCO 841/863 Smart Wi-Fi series has DC motors and energy-saving LED lights. They also have smartphone connectivity and battery backup.
The LDO332 and LDO50 models come with belt or chain drives. They all work in the same basic way, but have different features.
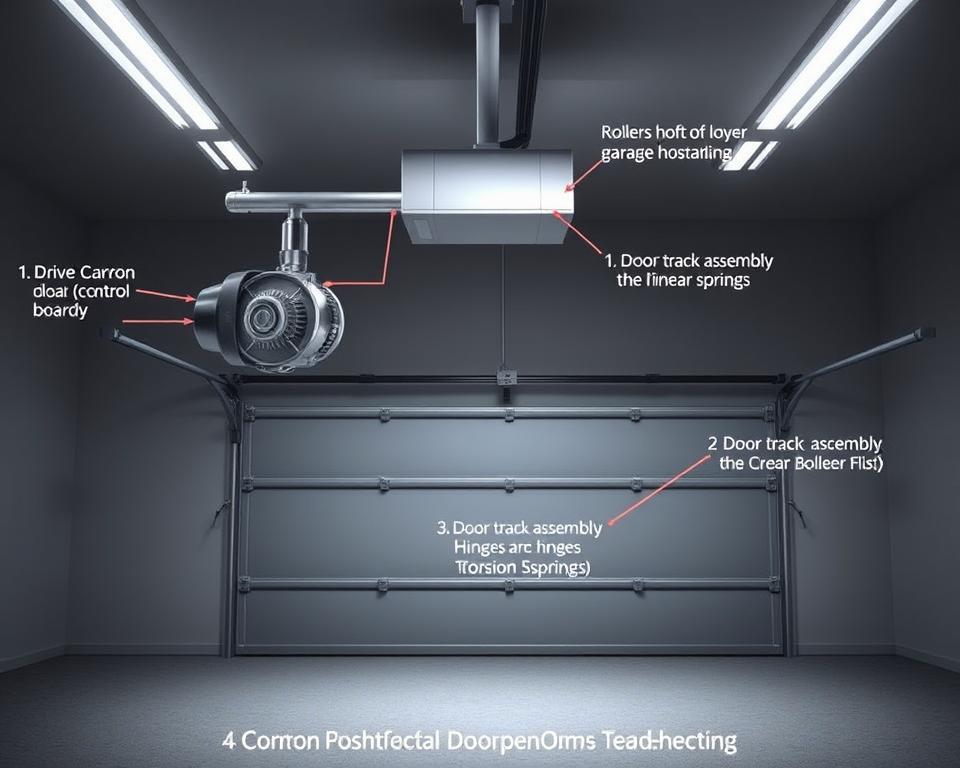
Basic Components and Their Functions
Every Linear garage door opener has essential components. The motor unit is mounted on the ceiling. It powers the whole system.
A rail and drive mechanism connect the motor to your door. The trolley moves along the rail to open and close the door.
Safety sensors near the floor detect objects in the door’s path. They’re key to preventing accidents by stopping the door from closing on people or pets.
Control Panel Features
The control panel on your wall has buttons for opening the door and controlling lights. It also has programming buttons for remotes and keyless entry. Some panels even have vacation lock modes for extra security when you’re not home.
Motor and Drive Mechanisms
The motor and drive system are the heart of your Linear opener. DC motors are quieter and smoother than AC motors. They move your door efficiently.
| Drive Type | Noise Level | Durability | Cost | Maintenance |
|---|---|---|---|---|
| Belt Drive | Very Quiet | Excellent | Higher | Minimal |
| Chain Drive | Moderate | Very Good | Lower | Occasional |
| Screw Drive | Moderate | Good | Medium | Regular |
Tools Needed for Troubleshooting Linear Garage Door Openers
Fixing a Linear garage door opener starts with the right tools and safety gear. Being prepared saves time and keeps you safe. Here’s what you need to fix your garage door system.
Essential Tools for Diagnosis
You’ll need basic hand tools to diagnose your Linear opener. A set of screwdrivers (Phillips and flathead) is key for getting inside and adjusting things. Adjustable wrenches and pliers are great for tightening and loosening parts.
A good multimeter is vital for checking electrical connections. A bright flashlight is also important for seeing in dim places.

Some Linear opener diagnostic tools are specific to certain models. A voltage tester finds electrical problems, and a level makes sure sensors are right. Always check your manual for special tools needed for your model.
Safety Equipment Requirements
Working on garage doors needs the right garage door safety equipment to avoid injuries. Heavy-duty gloves protect your hands from cuts and sharp edges. Safety glasses keep your eyes safe from falling things and dust.
A strong step ladder with non-slip feet is essential for reaching the opener on your ceiling. If you’re working with electrical parts, wear rubber-soled shoes and insulated tools. Safety always comes first when dealing with garage door systems.
Safety Precautions Before Attempting Repairs
Before you start fixing your Linear garage door opener, it’s crucial to know the safety basics. Garage doors have heavy parts and electricity, which can be dangerous if not handled right. By following safety steps, you can avoid serious injuries.
Electrical Safety Considerations
When dealing with your Linear opener electrical safety is key. Always turn off the power to your garage door opener before starting work. Unplug it or switch off the circuit breaker at your home’s electrical panel.
Don’t work on electrical parts during storms or on wet surfaces. Water and electricity are a deadly mix. After turning off the power, wait five minutes before touching any internal parts. This lets capacitors discharge safely.
Mechanical Safety Measures
Following garage door mechanical safety rules helps prevent crushing injuries and unexpected door movements. Always:
- Use the red emergency release handle to disconnect the opener from the door
- Secure the door in the open position with locking pliers on the track if working underneath
- Keep fingers and hands away from rollers, hinges, and other pinch points
- Wear heavy-duty gloves when handling metal components
Never try to adjust, loosen, or tighten door springs or cables. They hold a lot of energy and can cause serious injuries if they snap or release unexpectedly.
When to Avoid DIY Repairs
While many garage door repair safety tasks can be done by homeowners, some need a pro. Call a certified technician if:
- Your door has broken springs or cables
- The door is severely unbalanced or falls rapidly when disconnected
- Major structural components are damaged or bent
- You’re uncomfortable working with electrical systems
- The repair requires specialized tools you don’t possess
Remember, your safety is more important than saving money on a pro. If unsure, always call an expert. They have the right training and tools for complex repairs.
How to Diagnose Linear Garage Door Opener Issues
When your Linear garage door opener stops working, finding the problem is key. A systematic approach helps you pinpoint the issue before fixing it. This way, you avoid wasting time and prevent damage from wrong repairs.
Visual Inspection Process
Start by looking closely at the garage door system. Check for any damage to the opener, rail, and door parts. Look for loose parts, worn-out items, or frayed wires that might cause problems.
Check the chain or belt for the right tension. If it’s off, the door might move strangely or the motor could get strained. Always check the safety sensors at the door’s bottom for correct alignment. They should have steady LED lights.
Listening for Unusual Sounds
Your ears can help you find issues with the garage door opener. Different sounds can mean different problems. Listen carefully when the door moves and note any odd noises.
| Sound Type | Possible Cause | Component Affected | Urgency Level |
|---|---|---|---|
| Grinding | Worn gears or motor problems | Main drive mechanism | High |
| Rattling | Loose hardware or brackets | Door tracks or mounting hardware | Medium |
| Scraping | Door rubbing against track | Door panels or track alignment | Medium |
| Straining motor | Unbalanced door or mechanical resistance | Springs or opener motor | High |
Testing Remote and Wall Controls
Test each control device separately to find control issues. First, try the wall button, then the remote. This helps figure out if the problem is with a specific device or the main unit.
If the door works with the wall button but not the remote, it might be a battery or programming issue. If neither works, check for power and wiring connections.
Control Panel Diagnostics
Modern Linear garage door openers have built-in diagnostics. Look for LED lights that flash in patterns to show problems. Count the flashes to get an error code, then check your manual for what it means.
For example, three flashes on LDCO 841/863 models often mean a safety beam issue. Four flashes suggest too much force. Some models have digital displays with detailed error messages.
Common Linear Garage Door Opener Error Codes and Their Meanings
When your Linear garage door opener goes wrong, it shows error codes. These codes help find out what’s wrong quickly. They save you time and make fixing things easier. Linear uses LED lights, beep sequences, and digital displays to show errors.
LED Light Patterns and What They Indicate
LED flash patterns are the main way Linear openers show problems. Each pattern means something different:
- 1 Flash – This is actually good news! It means everything is working right or a remote was programmed.
- 2 Flashes – Your door won’t close because of shorted wires. Check for pinched wires or staples.
- 3 Flashes – The door won’t close because of a safety beam obstacle. Look for objects blocking the sensor path or check if the sensors are misaligned.
- 4 Flashes – Door reverses unexpectedly or won’t operate properly. This means your door might be binding or unbalanced.

- 5 Flashes – Door won’t respond to transmitter because the vacation lock switch is engaged. Simply deactivate this security feature on your wall station.
- 6 Flashes – The most serious code, indicating the motor ran longer than 30 seconds. This suggests a mechanical or electronic failure that might require professional service.
Beep Sequence Interpretations
Many Linear models also use audible signals to communicate problems. A single beep during normal operation is typical, but multiple beeps in specific patterns indicate various issues.
Five consecutive beeps when attempting to operate the door typically confirms that the vacation lock mode is engaged. Three rapid beeps often signal sensor misalignment, while a continuous beeping pattern may indicate a serious system fault requiring immediate attention.
Display Error Messages on Digital Models
Newer Linear garage door openers feature digital displays that show alphanumeric error codes. These provide more detailed diagnostic information than light flashes or beeps alone.
Common digital codes include “E1” (indicating sensor issues), “E2” (suggesting motor problems), and “E3” (signaling control board malfunctions). Always consult your specific model’s manual for the exact meaning of these codes, as they can vary slightly between different Linear opener models.
Understanding these error codes allows you to quickly identify problems and determine whether you can fix them yourself or need to call a professional. Keep your owner’s manual handy as a reference guide for interpreting these diagnostic signals specific to your Linear model.
How to Fix Linear Garage Door Opener Errors with Remote Controls
Dealing with unresponsive Linear garage door remote controls is a common headache. It usually has simple solutions. Before calling a professional, try these troubleshooting methods to get your garage door working again.
Remote Battery Replacement
The most frequent cause of remote control failure is a dead battery. If your remote’s red indicator light glows dimly or doesn’t light up, it’s time for a battery change.
To replace batteries in most Linear remotes:
- Locate the small slot on the remote case and open it using a coin or small screwdriver
- Carefully remove the circuit board
- Replace the old batteries with new Type 2032 batteries (plus side facing up)
- Reassemble the remote by snapping the case back together
Pro tip: Clean the battery contacts with a pencil eraser if you notice any corrosion before installing new batteries.

Remote Reprogramming Steps
If fresh batteries don’t solve the problem, your remote might need reprogramming. Follow these steps for most Linear garage door opener models:
- Locate and press the LEARN button on your opener unit
- The red LEARN light will illuminate for approximately 15 seconds
- While the light is on, press the button on your remote that you want to program
- The opener’s light and the red indicator will flash once to confirm successful programming
For multiple remotes, simply repeat this process for each device. Most Linear openers can store codes for up to 8-10 different remote controls.
Addressing Signal Interference Issues
Sometimes remote controls work inconsistently due to signal interference. Common sources include nearby electronic devices, metal objects, and certain types of lighting fixtures.
Try operating your remote from different positions to identify potential interference zones. If your remote works only when standing in specific spots, interference is likely the culprit.
Resetting Remote Frequencies
For persistent interference problems, resetting all remote frequencies might help:
- Press and hold the LEARN button on your opener for at least 10 seconds
- Release when the red light blinks three times
- This erases all stored remote codes from the opener’s memory
- Reprogram each remote using the steps outlined above
Also check that the opener’s antenna wire (the short white wire extending from the unit) hangs straight down and isn’t coiled or damaged. This significantly affects signal reception range.
Resolving Power and Electrical Problems
When your Linear garage door opener doesn’t work, power and electrical issues are often the cause. These problems can be simple, like a loose plug, or more complex, like wiring issues. Luckily, many electrical troubleshooting steps are easy to do without needing to be an expert.
Power Supply Troubleshooting
Begin with the basics when dealing with Linear opener power problems. First, make sure your garage door opener is plugged in correctly. It’s easy to overlook, but plugs can come loose over time.
Try plugging in another device, like a lamp or phone charger, into the same outlet. If it doesn’t work, the outlet might be the problem. Use a voltage tester to check if there’s power.
Some Linear models have a power switch on the motor unit. It might have been turned off by mistake. Look for any switches on the sides or back of your opener that need to be turned back on.

Circuit Breaker and Fuse Checks
If the outlet has power but your opener still doesn’t work, check your home’s electrical panel. Find the circuit breaker for the garage and reset it. Push it fully to the “off” position, then back to “on.”
If you have a fuse box, check if the garage fuse has blown. A blown fuse will have a broken filament or look discolored. Replace it with a fuse of the same amperage rating.
Wiring Connection Inspection
When troubleshooting garage door wiring, look at all visible connections. Check for frayed wires, loose terminals, or signs of damage from rodents.
Pay close attention to the wiring at the wall control station. Wires that are shorted here can stop doors from closing. Make sure both wires are securely connected without being compressed by staples.
If you’re still having electrical problems, use a multimeter to test wires for continuity. This tool can find wiring breaks that you can’t see.
If you’re not sure about working with electrical parts or can’t fix the problem, call a professional garage door technician. Electrical issues can sometimes point to bigger problems that need expert help.
Fixing Sensor and Safety Feature Malfunctions
When your Linear garage door acts strangely, sensor and safety issues are often the cause. These parts stop accidents by spotting things in the door’s way. But, they need upkeep to work right.
Photo Eye Sensor Alignment
The safety beam system has two parts on each side of your garage door, about 6 inches up. One sends a beam, and the other catches it. If something blocks the beam, the door will stop and go back up.
To see if they’re aligned, check the LED lights on both sensors. They should both show a green light when working. The receiver should have a solid red LED when the beam is right. If the red light is off or flickering, you need to adjust the sensors.
To align the Linear safety beam properly, loosen the brackets a bit. Move both units until the receiver’s red light is steady. Then, adjust the sender slightly up until the red light flickers, and then back down until it’s steady again.

Safety Reversal System Testing
After setting up your sensors, test the safety system. Place a solid object, like a piece of wood, in the beam’s path. Press the door button to close it. The door should stop and go back up when it hits the object.
If the door keeps going, stop it right away. You need to adjust the system more before you can use it again.
Sensor Wiring and Connection Checks
Wiring problems often cause sensor issues. Look for any damage, pinches, or loose spots in the wires. Make sure they’re connected well to the opener unit, marked “COM” and “BEAM.”
Look for corroded or loose connections. Gently pull on each wire to check if it’s tight. If you find damaged wiring, replace it to fix the problem.
Cleaning Sensor Lenses
Dirt, dust, and moisture can mess with the infrared beam. It’s key to clean the photo eye sensor often. Use a soft cloth to wipe the lenses. Avoid harsh chemicals that could harm the plastic.
For tough dirt, dampen your cloth a bit with water or mild glass cleaner. Clean the sensors every month if your area is dusty or spider season is near. Spiders’ webs often block the beam.
Troubleshooting Mechanical Issues
Fixing mechanical problems with your Linear garage door opener starts with knowing common issues. If your garage door moves jerkily, makes grinding noises, or stops mid-cycle, it’s a sign of trouble. Quick action can prevent bigger damage to your opener.
Chain and Belt Drive Problems
Chain and belt drive issues are common Linear opener mechanical problems. The main problem is usually wrong tension. If the chain is too loose, it might slip or jump teeth. But if it’s too tight, it can wear out parts and strain the motor.
To check chain tension, look at its position on the rail. The turnbuckle should be a bit above the rail. To adjust, hold the turnbuckle with a screwdriver while loosening the locknuts. Then, twist the turnbuckle to adjust tension and retighten the locknuts.
For belt-drive models, check the tension spring in the traveler. It should be between 0.9″ and 1″ long. If it’s longer, tighten the belt. Find the adjustment wheel in the traveler and use a screwdriver to turn it, compressing the spring to the right length.
Gear and Sprocket Maintenance
Keeping gears and sprockets in good shape is key for your Linear opener’s smooth operation. Regularly check for worn teeth, cracks, or too much play. While you can’t service most internal gears yourself, look for visible damage and grease buildup.
If you hear grinding sounds or see damaged teeth, these parts might need replacing. For issues like the opener straining, check the door balance by disconnecting the opener and manually opening the door.
Lubrication Requirements
It’s important to lubricate all mechanical parts in your garage door system. Linear suggests lubricating hinges, rollers, and bearings every six months, following the manufacturer’s guidelines.
Important: Don’t lubricate the chain, belt, or rail as it can attract dirt and cause slippage. Instead, use a silicone-based spray on the rail’s inside where the trolley slides for smooth movement.
Tension Adjustment Procedures
For chain-drive rails, proper garage door chain adjustment means checking the turnbuckle’s position on the rail. If it needs adjusting, loosen the locknuts, turn the turnbuckle, and then retighten the locknuts while holding the turnbuckle steady.
For belt drive troubleshooting, find the tension adjustment wheel in the traveler. Turn it clockwise with a screwdriver to increase tension until the spring is 0.9-1″ long.
A well-balanced door should stay still when stopped halfway open. If it drops or rises on its own, the spring tension needs a pro’s touch. This affects the opener’s performance and life span.
Conclusion
In this guide, we’ve covered how to find and fix common Linear garage door opener problems. By following a step-by-step guide, you can solve most issues. Always keep safety in mind.
Regular maintenance is key to avoiding many problems. Make it a habit to check the door balance and safety reversal system every month. These quick checks can save you from expensive repairs and keep everyone safe.
Don’t forget to lubricate moving parts twice a year and check for wear on hardware. Also, clean the photo eye sensors often to avoid false triggers. Even if your remote batteries seem to work, replace them once a year.
Know when to call a pro for repairs. Springs, big electrical issues, and structural problems need a certified technician. If you’ve tried the troubleshooting steps and still have problems, it’s time to get help.
A well-kept Linear opener can last 10-15 years. By following this guide, you’ll make your system last longer. It will also work safely and smoothly for your family.
Remember, your garage door is the biggest moving thing in your home. Taking good care of it saves money and keeps everyone safe.